[Android/Kotlin] Retrofit2를 통한 API 호출 (with Upbit API)
Notepad96
·2022. 8. 30. 10:47
1. 요약

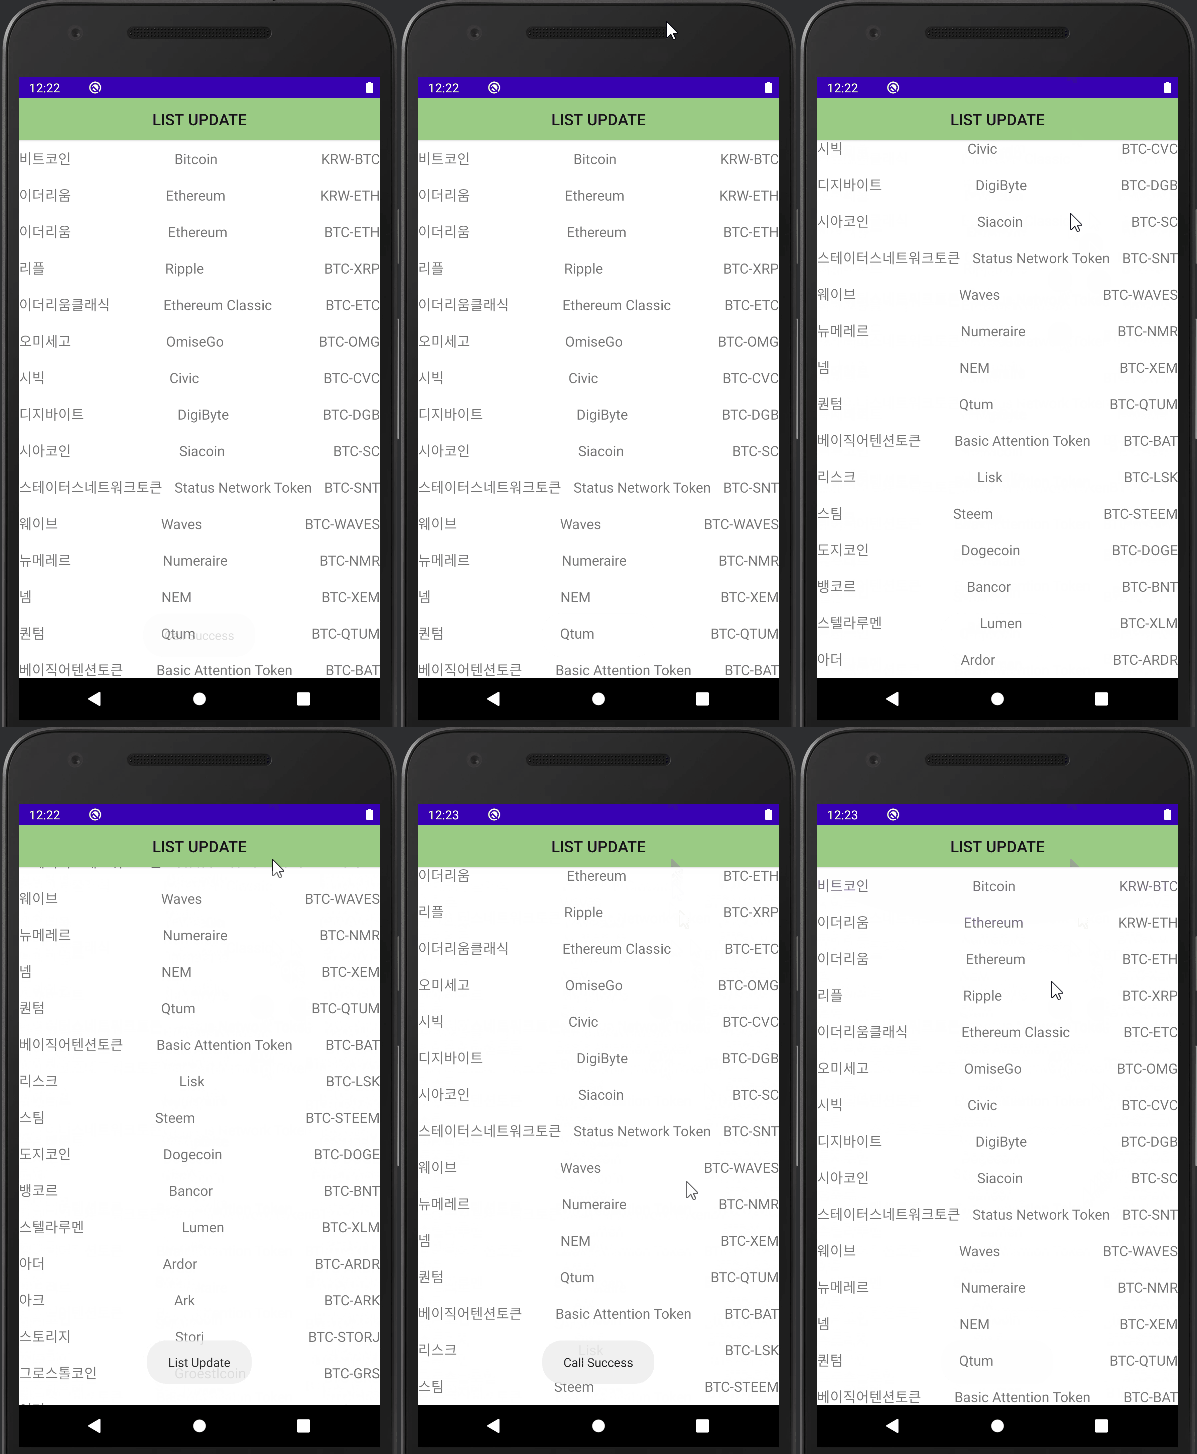
이번 글에서는 Retrofit2 라이브러리를 사용하여 API를 호출하여 불러온 데이터를 이용하여 RecyclerView에 나타내는 과정에 관하여 기술한다.
Retrofit은 API 통신을 위한 라이브러리로 속도, 편의성, 동기/비동기 처리 등 여러 장점이 존재하는 라이리이다.
사용할 Open API로서 Upbit를 사용할 것이며 이에 관한 내용은 아래 링크에서 확인해보면 된다.
업비트 개발자 센터
업비트 Open API 사용을 위한 개발 문서를 제공 합니다.업비트 Open API 사용하여 다양한 앱과 프로그램을 제작해보세요.
docs.upbit.com
작업에 들어가기 전 권한 부여 및 라이브러리 사전 환경 세팅이 필요하다.
● Internet 권한 추가

● Retrofit 라이브러리 추가

(https://square.github.io/retrofit/)
2. 레이아웃
2-1. activity_main.xml
메인 레이아웃으로 Button 1개와 RecyclerView 1개로 구성하였다.
Button은 눌렀을 경우 API로 호출된 데이터를 사용하여 리스트가 업데이트 되어 나타내도록 만드는 클릭 이벤트를 구현하였다.
<?xml version="1.0" encoding="utf-8"?>
<LinearLayout xmlns:android="http://schemas.android.com/apk/res/android"
    xmlns:app="http://schemas.android.com/apk/res-auto"
    xmlns:tools="http://schemas.android.com/tools"
    android:layout_width="match_parent"
    android:layout_height="match_parent"
    android:orientation="vertical"
    tools:context=".MainActivity">

    <androidx.appcompat.widget.AppCompatButton
        android:id="@+id/btn01"
        android:layout_width="match_parent"
        android:layout_height="wrap_content"
        android:background="#9ACC84"
        android:textSize="18sp"
        android:text="List Load" />

    <androidx.recyclerview.widget.RecyclerView
        android:id="@+id/recycler01"
        android:layout_width="match_parent"
        android:layout_height="match_parent"/>

</LinearLayout>
2-2. item_list.xml
리스트 항목에 대한 레이아웃으로서 TextView 3개로 나타내었다.
<?xml version="1.0" encoding="utf-8"?>
<LinearLayout xmlns:android="http://schemas.android.com/apk/res/android"
    android:layout_width="match_parent"
    android:layout_height="wrap_content"
    android:orientation="horizontal"
    android:paddingVertical="10dp">

    <TextView
        android:id="@+id/text01"
        android:layout_width="wrap_content"
        android:layout_height="wrap_content"
        android:layout_weight="1"
        android:text="sample01"
        android:textSize="16sp"/>
    <TextView
        android:id="@+id/text02"
        android:layout_width="wrap_content"
        android:layout_height="wrap_content"
        android:layout_weight="1"
        android:gravity="center"
        android:text="sample02"
        android:textSize="16sp"/>
    <TextView
        android:id="@+id/text03"
        android:layout_width="wrap_content"
        android:layout_height="wrap_content"
        android:layout_weight="1"
        android:gravity="right"
        android:text="sample03"
        android:textSize="16sp"/>

</LinearLayout>
3. 코드 및 설명
3-1. ApiObject.kt
Retrofit을 사용하기 위해서 Builder를 초기화하거나 공통된 BASE_URL을 갖거나 하는, 불필요한 코드 반복이 없게 하기 위해서 Object 타입으로 정의를 해준다.
package com.notepad96.apiretrofit

import retrofit2.Retrofit
import retrofit2.converter.gson.GsonConverterFactory

object ApiObject {
    private const val BASE_URL = "https://api.upbit.com/"

    private val getRetrofit by lazy{
        Retrofit.Builder()
            .baseUrl(BASE_URL)
            .addConverterFactory(GsonConverterFactory.create())
            .build()
    }

    val getRetrofitService : UpbitAPI by lazy { getRetrofit.create(UpbitAPI::class.java) }
}
3-2. UpbitAPI.kt
interface를 정의해주며 해당 예시에서는 Upbit에서 REST API를 호출해보도록 한다.
여기서 @GET("v1/market/all") 부분을 보면 앞서 보았던 BASE_URL 뒤에 "/v1/market/all"이 붙는 주소로 GET 요청을 하겠다는 의미이다.
이외의 Upbit REST API에 관한 사항은 아래 링크를 참조하면 될 것 같다.
업비트 개발자 센터
업비트 Open API 사용을 위한 개발 문서를 제공 합니다.업비트 Open API 사용하여 다양한 앱과 프로그램을 제작해보세요.
docs.upbit.com
package com.notepad96.apiretrofit

import retrofit2.Call
import retrofit2.http.GET

interface UpbitAPI {
    @GET("v1/market/all")
    fun getCoinAll(
    ): Call<List<Coin>>
}
3-3. Coin.kt
Data Class로서 호출할 API에 JSON 구성에 맞춰 정의해준다. 여기서는 아래 링크로 테스트를 진행할 것이기 때문에 이에 맞추어 Data Class를 구성한다.
https://api.upbit.com/v1/market/all (링크 클릭 시 데이터 확인 가능)
package com.notepad96.apiretrofit

data class Coin(
    val market: String,
    val korean_name: String,
    val english_name: String
)
3-4. ListAdapter.kt
RecyclerView에 사용할 Adapter 정의 파일이다.
레이아웃은 3개의 TextView로 구성되어 있으며 이를 각각 불러온 데이터가 갖는 값인 korean_name, english_name, market 텍스트로 초기화해주었다.
또한, setList 함수를 정의하여 coinList을 변경할 수 있도록 하였고 Main에서는 이를 RecyclerView의 Adapter를 통하여 접근한 후 호출한다.
package com.notepad96.apiretrofit

import android.view.LayoutInflater
import android.view.ViewGroup
import androidx.recyclerview.widget.RecyclerView
import com.notepad96.apiretrofit.databinding.ItemListBinding

class ListAdapter: RecyclerView.Adapter<ListAdapter.MyView>() {
    private var coinList = listOf<Coin>()

    inner class MyView(private val binding: ItemListBinding): RecyclerView.ViewHolder(binding.root) {
        fun bind(pos: Int) {
            binding.text01.text = coinList[pos].korean_name
            binding.text02.text = coinList[pos].english_name
            binding.text03.text = coinList[pos].market
        }
    }

    override fun onCreateViewHolder(parent: ViewGroup, viewType: Int): MyView {
        val view = ItemListBinding.inflate(LayoutInflater.from(parent.context), parent, false)
        return MyView(view)
    }

    override fun onBindViewHolder(holder: MyView, position: Int) {
        holder.bind(position)
    }

    override fun getItemCount(): Int {
        return coinList.size
    }

    fun setList(list: List<Coin>) {
        coinList = list
    }
}
3-5. MainActivity.kt
● Button 이벤트
Button을 클릭했을 경우 List Adapter에서 정의하였던 함수 setList를 통하여 List를 변경해주고 있으며 notifyDataSetChanged()를 호출하여 데이터가 변경되었으므로 리스트가 업데이트 되도록 만든다.
● API 호출
정의된 함수 initList의 API를 호출하기 위한 코드를 작성하였다.
앞서 정의하였던 ApiObject를 사용하며 call의 enqueue를 통해 Callback을 정의하여 onResponse와 onFailure를 오버라이드 한다. 각각 통신의 성공하거나 실패할 경우 동작을 작성해주면 된다.
onResponse를 보면 isSuccessful 상태 즉, 정상적으로 데이터를 받아왔을 경우이며 이때 response의 body를 읽어 리스트를 초기화해준다.
package com.notepad96.apiretrofit

import android.os.Bundle
import android.widget.Toast
import androidx.appcompat.app.AppCompatActivity
import androidx.recyclerview.widget.LinearLayoutManager
import com.notepad96.apiretrofit.databinding.ActivityMainBinding
import retrofit2.Call
import retrofit2.Callback
import retrofit2.Response

class MainActivity : AppCompatActivity() {
    private val binding: ActivityMainBinding by lazy { ActivityMainBinding.inflate(layoutInflater) }
    lateinit var listAdapter: ListAdapter
    var coinList = listOf<Coin>()

    override fun onCreate(savedInstanceState: Bundle?) {
        super.onCreate(savedInstanceState)
        setContentView(binding.root)
        listAdapter = ListAdapter()

        binding.btn01.setOnClickListener {
            listAdapter.setList(coinList)
            listAdapter.notifyDataSetChanged()
        }

        binding.recycler01.apply {
            adapter = listAdapter
            layoutManager = LinearLayoutManager(context)
            setHasFixedSize(true)
        }
        initList()
    }

    private fun initList() {
        val call = ApiObject.getRetrofitService.getCoinAll()
        call.enqueue(object: Callback<List<Coin>> {
            override fun onResponse(call: Call<List<Coin>>, response: Response<List<Coin>>) {
                Toast.makeText(applicationContext, "Call Success", Toast.LENGTH_SHORT).show()
                if(response.isSuccessful) {
                    coinList = response.body() ?: listOf()
                    listAdapter.setList(coinList)
                }
            }

            override fun onFailure(call: Call<List<Coin>>, t: Throwable) {
                Toast.makeText(applicationContext, "Call Failed", Toast.LENGTH_SHORT).show()
            }
        })
    }

}
4. 전체 파일
GitHub - Notepad96/BlogExample02
Contribute to Notepad96/BlogExample02 development by creating an account on GitHub.
github.com
'Android' 카테고리의 다른 글
| [Android/Kotlin] RecyclerView Expandable - 확장되는 리스트 (9) | 2022.09.03 |
|---|---|
| [Android/Kotlin] Expandable Layout - 레이아웃 확장하기 (0) | 2022.09.02 |
| [Android/Kotlin] CoordinatorLayout - 축소되는 앱 바 (1) | 2022.08.28 |
| [Android/Kotlin] RecyclerView Divider - 구분선 만들기 (0) | 2022.08.27 |
| [Android/Kotlin] RecyclerView Move to Top - 최상단 이동 (2) | 2022.08.26 |
 Notepad


