Android Kotlin programmatically button style - 동적 버튼 스타일 적용
Notepad96
·2021. 12. 8. 23:44
300x250

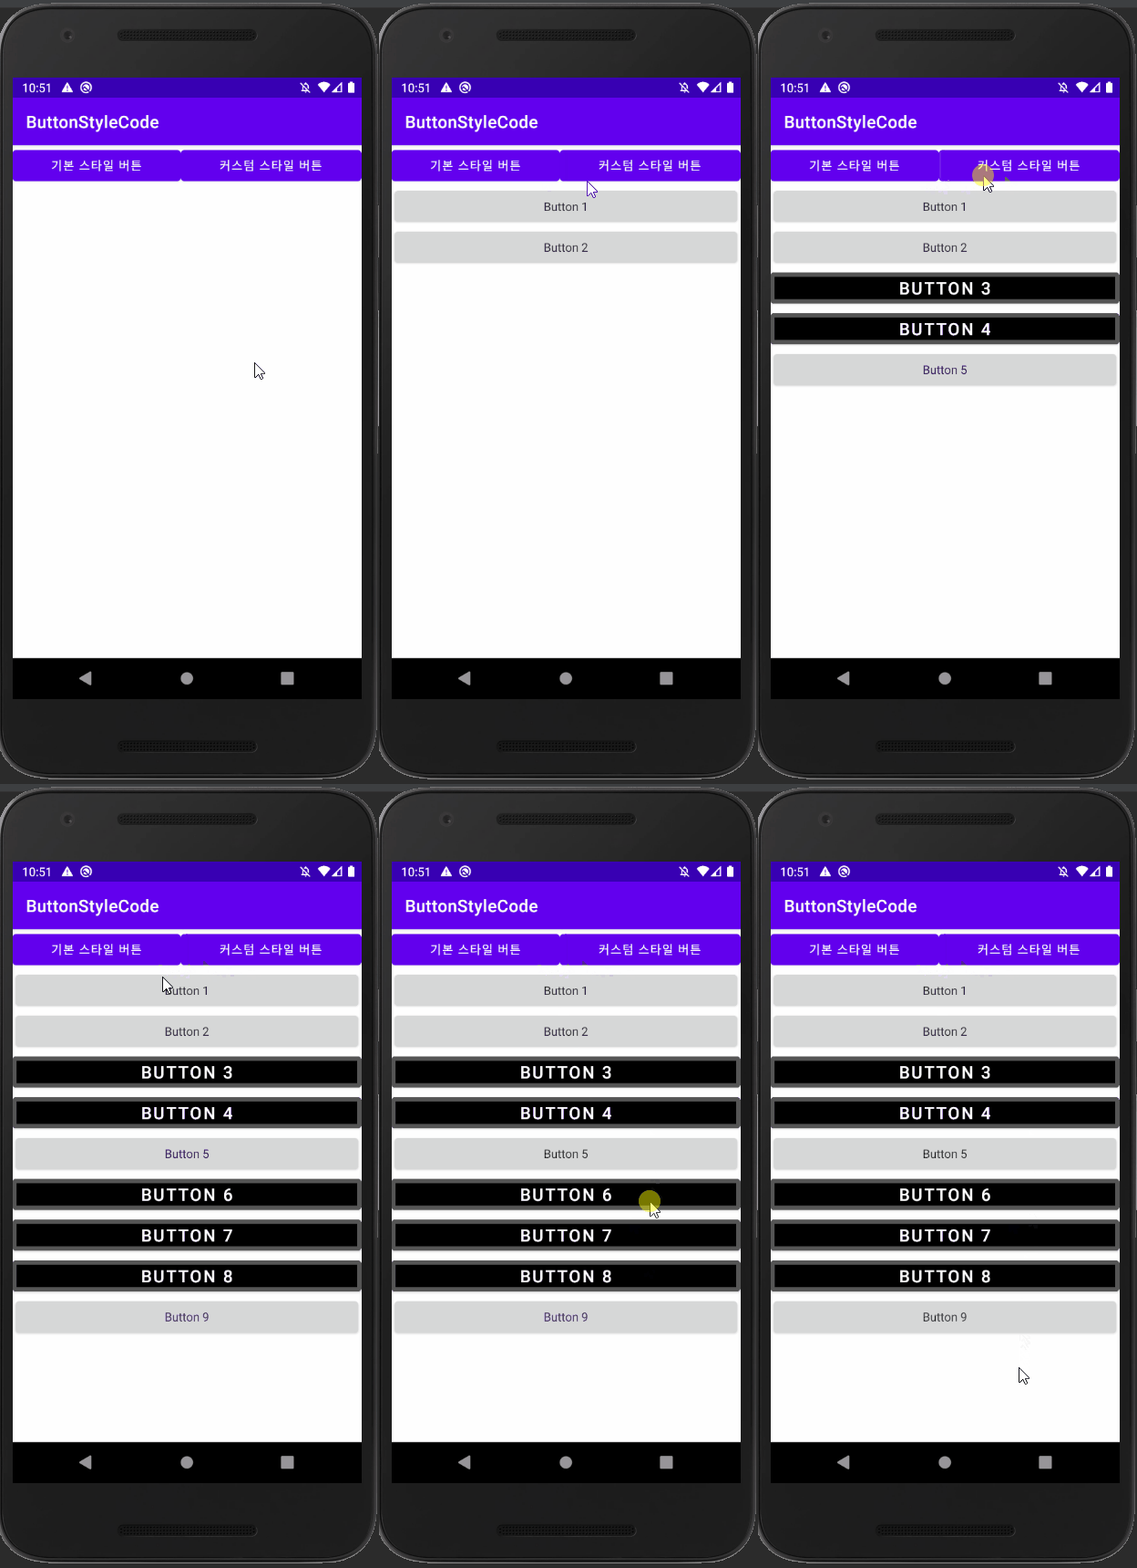
1. 결 과

# 해당 글은 동적으로 버튼을 추가할 경우 미리 style 리소스로 구현해논 스타일을 버튼의 적용하는 방법을 담고 있다.
2. activity_main.xml
<?xml version="1.0" encoding="utf-8"?>
<LinearLayout xmlns:android="http://schemas.android.com/apk/res/android"
    xmlns:tools="http://schemas.android.com/tools"
    android:layout_width="match_parent"
    android:layout_height="match_parent"
    android:orientation="vertical"
    tools:context=".MainActivity">

    <LinearLayout
        android:layout_width="match_parent"
        android:layout_height="wrap_content"
        android:orientation="horizontal">
        <Button
            android:id="@+id/vBtnAddDefault"
            android:layout_width="wrap_content"
            android:layout_height="wrap_content"
            android:text="기본 스타일 버튼"
            android:layout_weight="1"/>

        <Button
            android:id="@+id/vBtnAddCustom"
            android:layout_width="wrap_content"
            android:layout_height="wrap_content"
            android:text="커스텀 스타일 버튼"
            android:layout_weight="1"/>
    </LinearLayout>

    <LinearLayout
        android:id="@+id/vLayoutAddBtn"
        android:layout_width="match_parent"
        android:layout_height="wrap_content"
        android:orientation="vertical"/>
</LinearLayout>
# 기본 스타일을 갖는 버튼을 추가하는 버튼 1개
# 선언한 스타일을 갖는 버튼을 추가하는 버튼 1개
3. styles.xml
<?xml version="1.0" encoding="utf-8"?>
<resources>
    <style name="Button.Border" parent="Widget.MaterialComponents.Button.OutlinedButton">
        <item name="strokeWidth">5dp</item>
        <item name="strokeColor">#555555</item>
        <item name="android:backgroundTint">@color/black</item>
        <item name="android:textSize">20sp</item>
    </style>
</resources>
# 새로운 버튼 스타일 선언, strokeWidth와 strokeColor를 사용하여 테두리 선의 두깨와 색을 지정한다.
4. MainActivity.kt
package com.example.buttonstylecode

import android.os.Bundle
import android.widget.Button
import androidx.appcompat.app.AppCompatActivity
import androidx.appcompat.view.ContextThemeWrapper
import com.google.android.material.button.MaterialButton
import kotlinx.android.synthetic.main.activity_main.*

class MainActivity : AppCompatActivity() {
    override fun onCreate(savedInstanceState: Bundle?) {
        super.onCreate(savedInstanceState)
        setContentView(R.layout.activity_main)
        var num = 0

        vBtnAddDefault.setOnClickListener {
            var btn = Button(applicationContext)
            btn.text = "Button ${++num}"
            vLayoutAddBtn.addView(btn)
        }

        vBtnAddCustom.setOnClickListener {
            var newStyle = ContextThemeWrapper(this, R.style.Button_Border)
            var btn = MaterialButton(newStyle)
            btn.text = "Button ${++num}"
            vLayoutAddBtn.addView(btn)
        }
    }
}
# 선언한 style을 지정하기 위해서는 Button(context, null R.style.Button_Border)로 생성하였을 때 스타일 적용이 안된다.
# 따라서 style을 지정하기 위해서 ContextThemeWrapper과 MaterialButton을 사용하면 스타일 적용이 가능하다.
5. 전체 코드
GitHub - Notepad96/BlogExample
Contribute to Notepad96/BlogExample development by creating an account on GitHub.
github.com
300x250
'Android' 카테고리의 다른 글
| Android Kotlin Splash Page - 시작 페이지, 로고 페이지 (0) | 2021.12.20 |
|---|---|
| Android Kotlin SharedPreferences - 데이터 저장 (0) | 2021.12.19 |
| Android Kotlin Button Style - outline, text button (0) | 2021.12.07 |
| Android Kotlin Snackbar - 안내 메시지 표시 (0) | 2021.11.01 |
| Android Kotlin Intent Class Data put, get - Class Data 값 전달, 값 받기 (0) | 2021.10.31 |
 Notepad


